Preparing Walls for Painting

Wall Preparation Before Painting
To achieve a good finish on the walls it is imperative that you take the time to repair any problems on the wall surface, in order to create a flat smooth surface to receive the paint. Time well spent on this step is so worth it.
Repair Any Cracks And Holes
For repairing holes and cracks in the wall surface you will need to purchase a filler. Fillers are available in two formats, ready mixed, or a powder to be mixed with water. Also available for purchase are ‘Wall-repair kits’, ideal for repairing holes in drywall/plasterboard.
Firstly,
1. Remove any loose debris and dust from inside the cracks or holes. Loose dust can prevent the filler from forming a strong bond with the wall.
2. Apply filler into the crack or hole until it is slightly filled above the wall surface. If the hole or crack is deep, it’s advisable to fill it in layers using a filling knife.
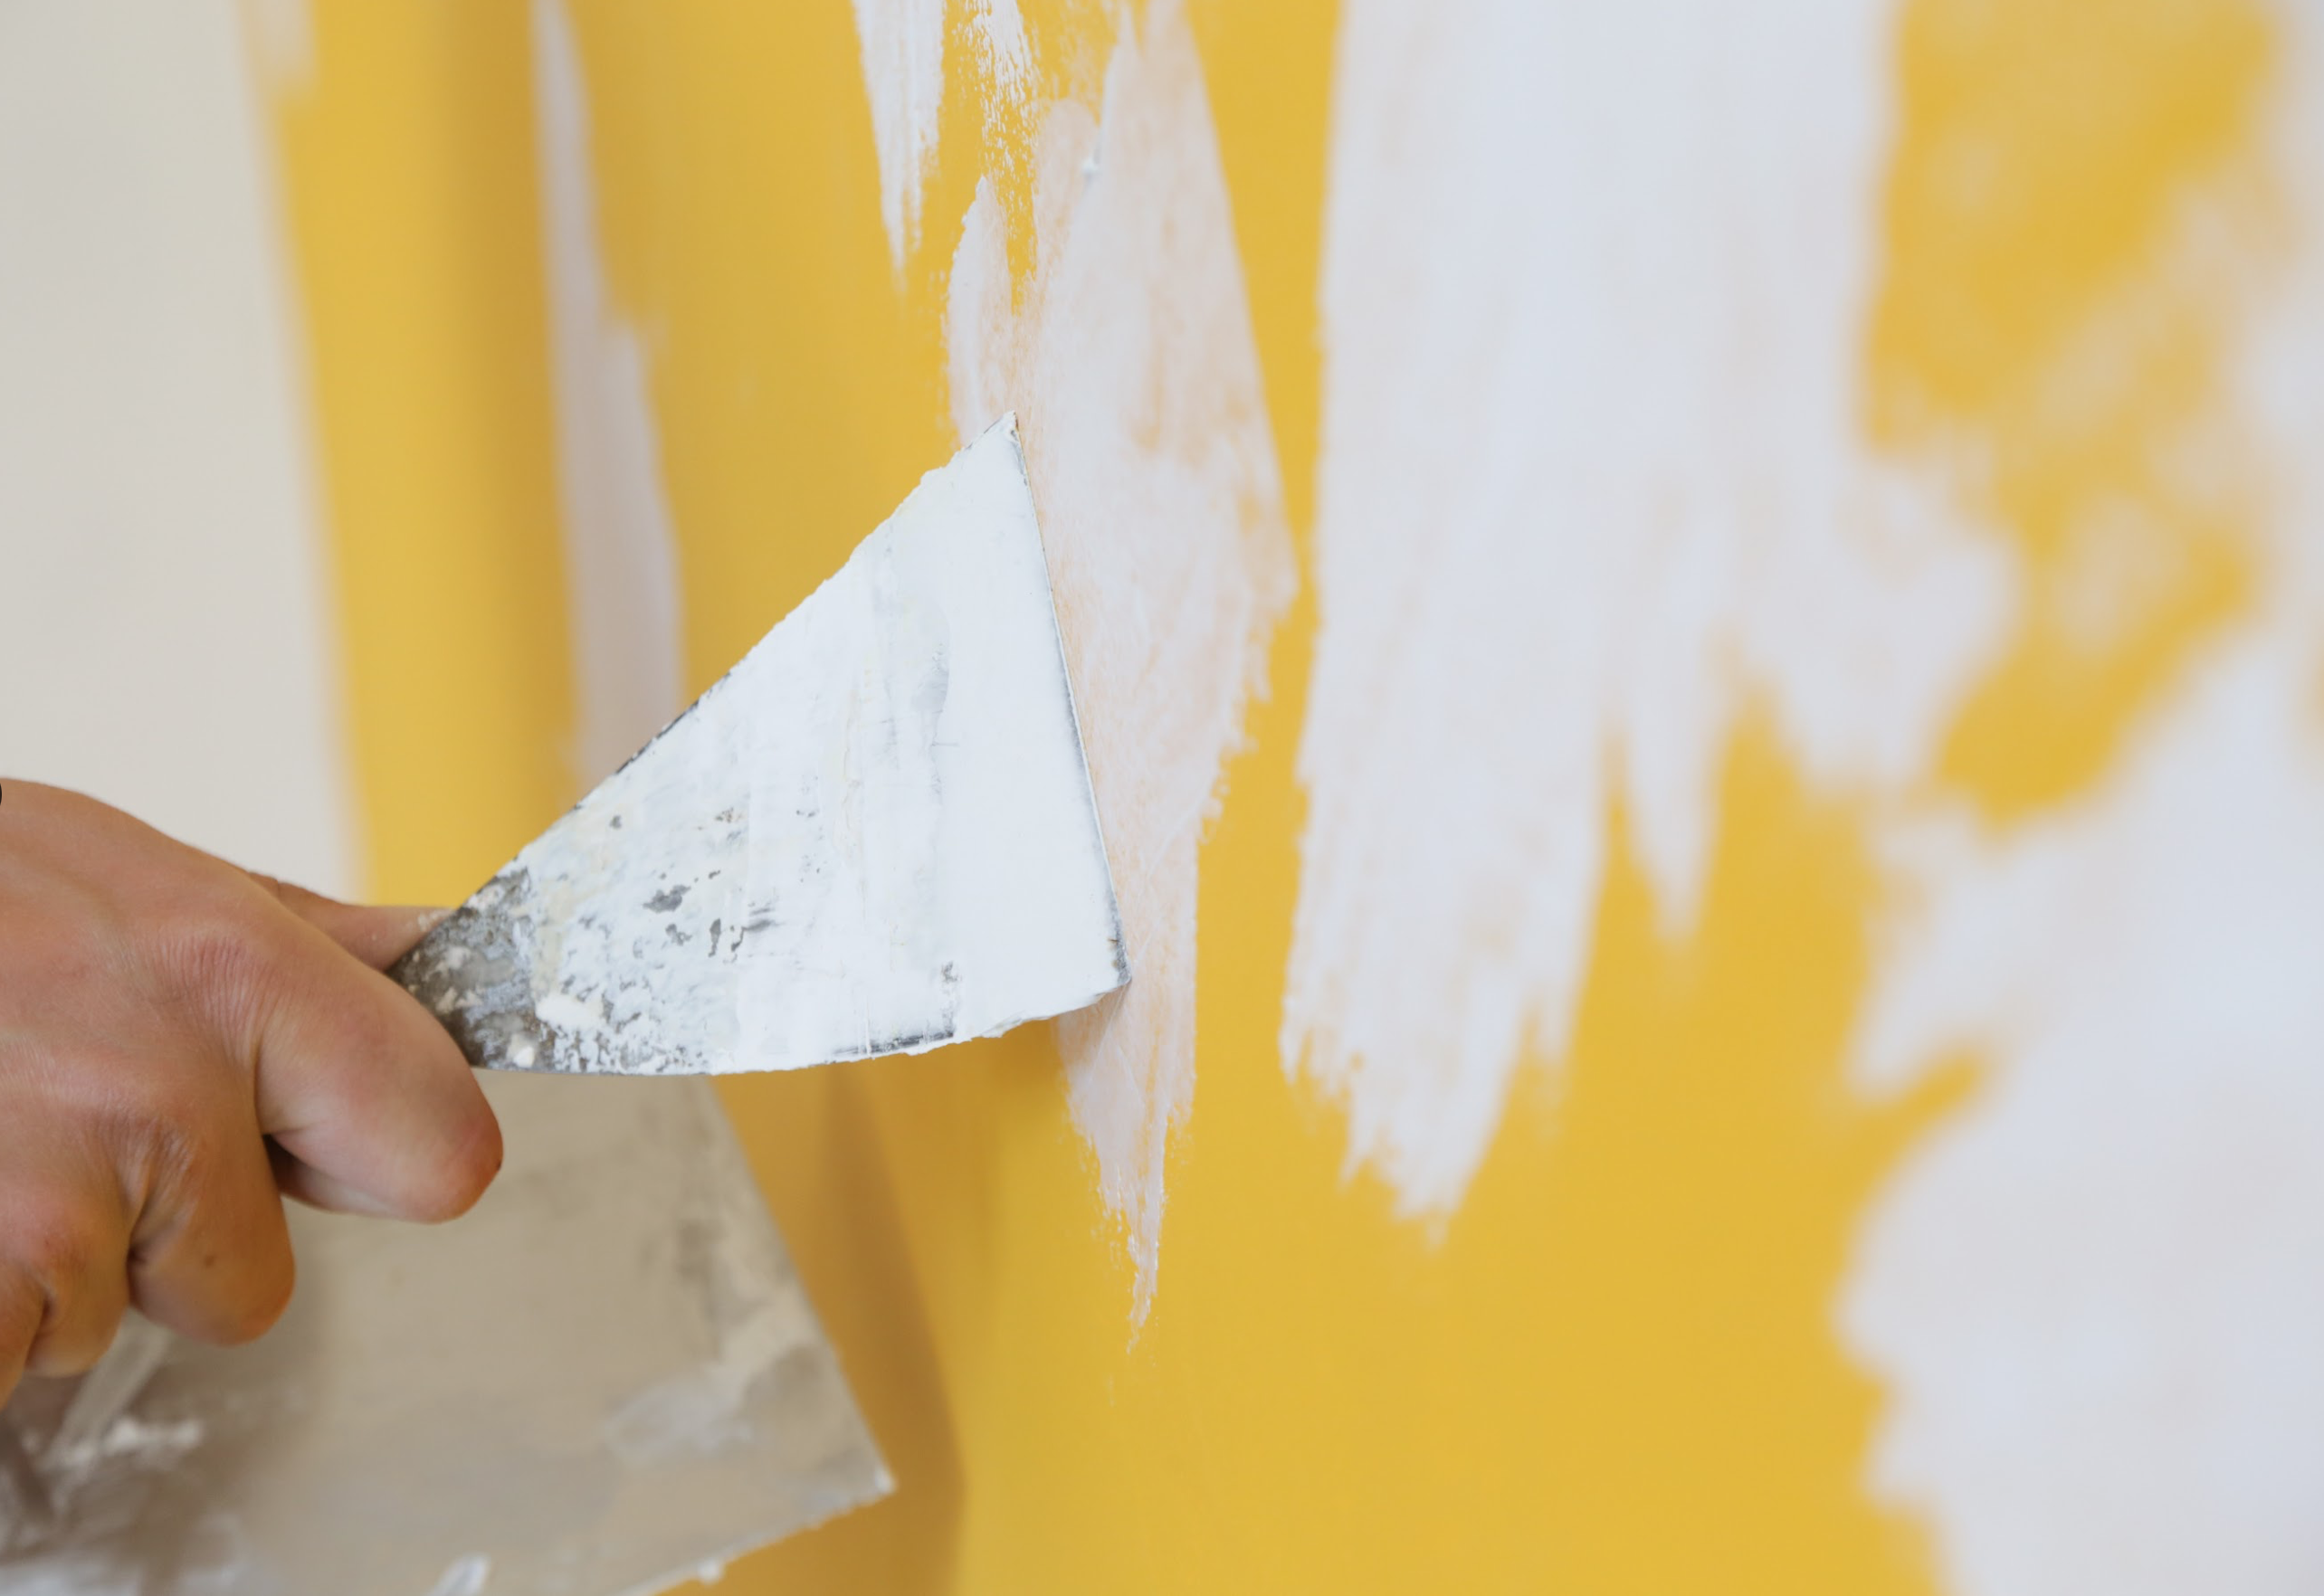

3. Let the filler dry (follow the manufacturers recommendation for drying time)
4. Sanding wall with a sanding block after skim coating. Preparation before painting. Renovation house concept.
5. Wash the wall surface with sugar soap (warm water with a little dish detergent will also suffice).
Priming Your Walls Before Painting
The reason to prime your walls before painting is to provide a stable surface that the paint can lock on to. The main conditions that necessitate the need for paint primer are:
Wall Surface Porosity
If the surface is too porous, too much of the paint can be drawn into the surface. This results in the need for multiple coats of paint to develop a thick, protective shell.
Conversely, paint adhesion is difficult when you have a very glossy surface. Because paint primer is slightly rough and porous, it provides an ideal surface for the paint to adhere to.
Stains
If you have low level stains, paint primer will help to cover them.
Colour Change
If you are changing from a dark to a light colour, use two coats of white paint primer. Nowadays, most paint retailers can tint primer making it closer to the color of the wall finish color. This reduces the number of primer coats and color coats you need to apply.
When Is A Primer Unnecessary?
If your walls are in very good condition and the color of your existing paint and new paint are similar, then a primer may not be needed.
Sanding the Primer
After the primer dries, use a very fine grit sandpaper and lightly sand away any bumps and ridges. Finish by wiping the wall with a clean damp cloth or sponge. Let it dry before you move on to applying paint.
Masking off

When you’re ready to paint remember to use painters tape to mask off the trim around the doors, windows and skirting board.
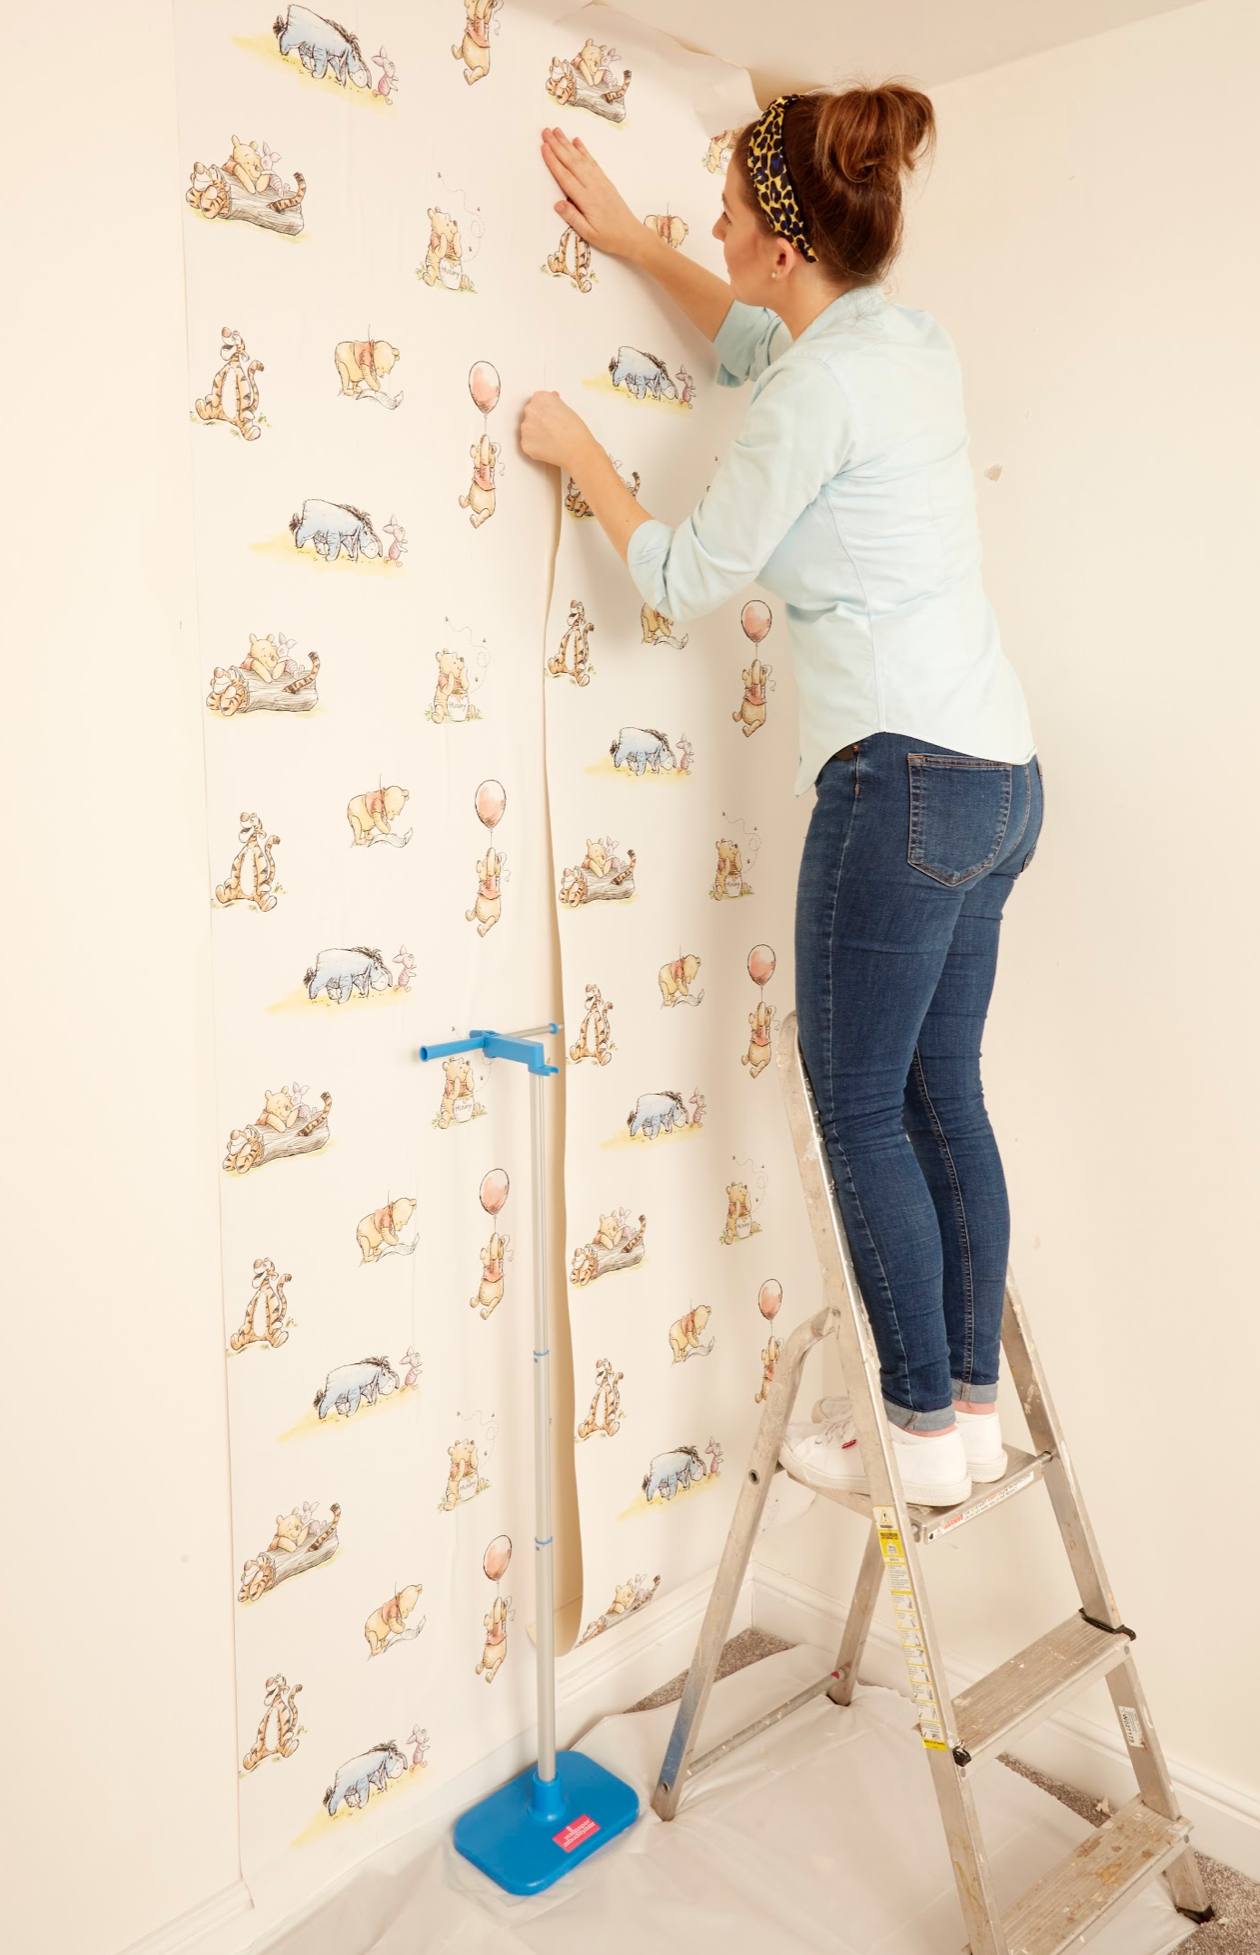
Wallpapering Too?
If your plan is to complete the room transformation with a beautiful wallpaper, then we suggest using WallpaperBuddy™, which makes wallpapering easy.
The WallpaperBuddy™ tool holds wallpaper away from the wall at an ideal angle for aligning and smoothing, and helps to reduce bubbles and creases. It’s telescopic design allows you to progress down the wall easily and efficiently, working with both hands free the entire time. At a fraction of the cost of hiring a professional, why not give WallpaperBuddy™ a try.
If you found this useful, why not share with a friend?
If you’re looking for more painting advice, we have prepared the following articles for you: