How to Wallpaper
A Chimney Breast
Wallpapering A Chimney Breast
Wallpapering around a chimney breast should be approached no differently than how you would wallpapering any other wall, including a feature wall.
The first and most important step is to consider where is the best place to begin? The design of your wallpaper needs to guide this decision. If the paper has a large pattern or motif, it is best to centralize the pattern in the middle of the chimney breast, as this will produce the most balanced look. A prominent feature in any room is what will draw a person’s eye upon entering, so it makes sense to create the best visual here. If your wallpaper has a small pattern, then starting in the centre of the chimney breast is not as important.

Following are two examples and options for you to consider.

1. Measure the chimney breast and draw a line on the wall to mark where the centre is.
2. Measure a new plumb line half the width of the wallpaper to the left of the centre line (10 -10¼ inches (26 – 26.5cm) for standard width wallpaper.
3. Hang the first length of wallpaper in the center.
4. Paper to the right of the first length around the external corner and into the internal corner.
5. Paper to the left of the first length around the external corner and into the internal corner.
6. Continue wallpapering the adjacent strips as you progress around the room.
Method 2:
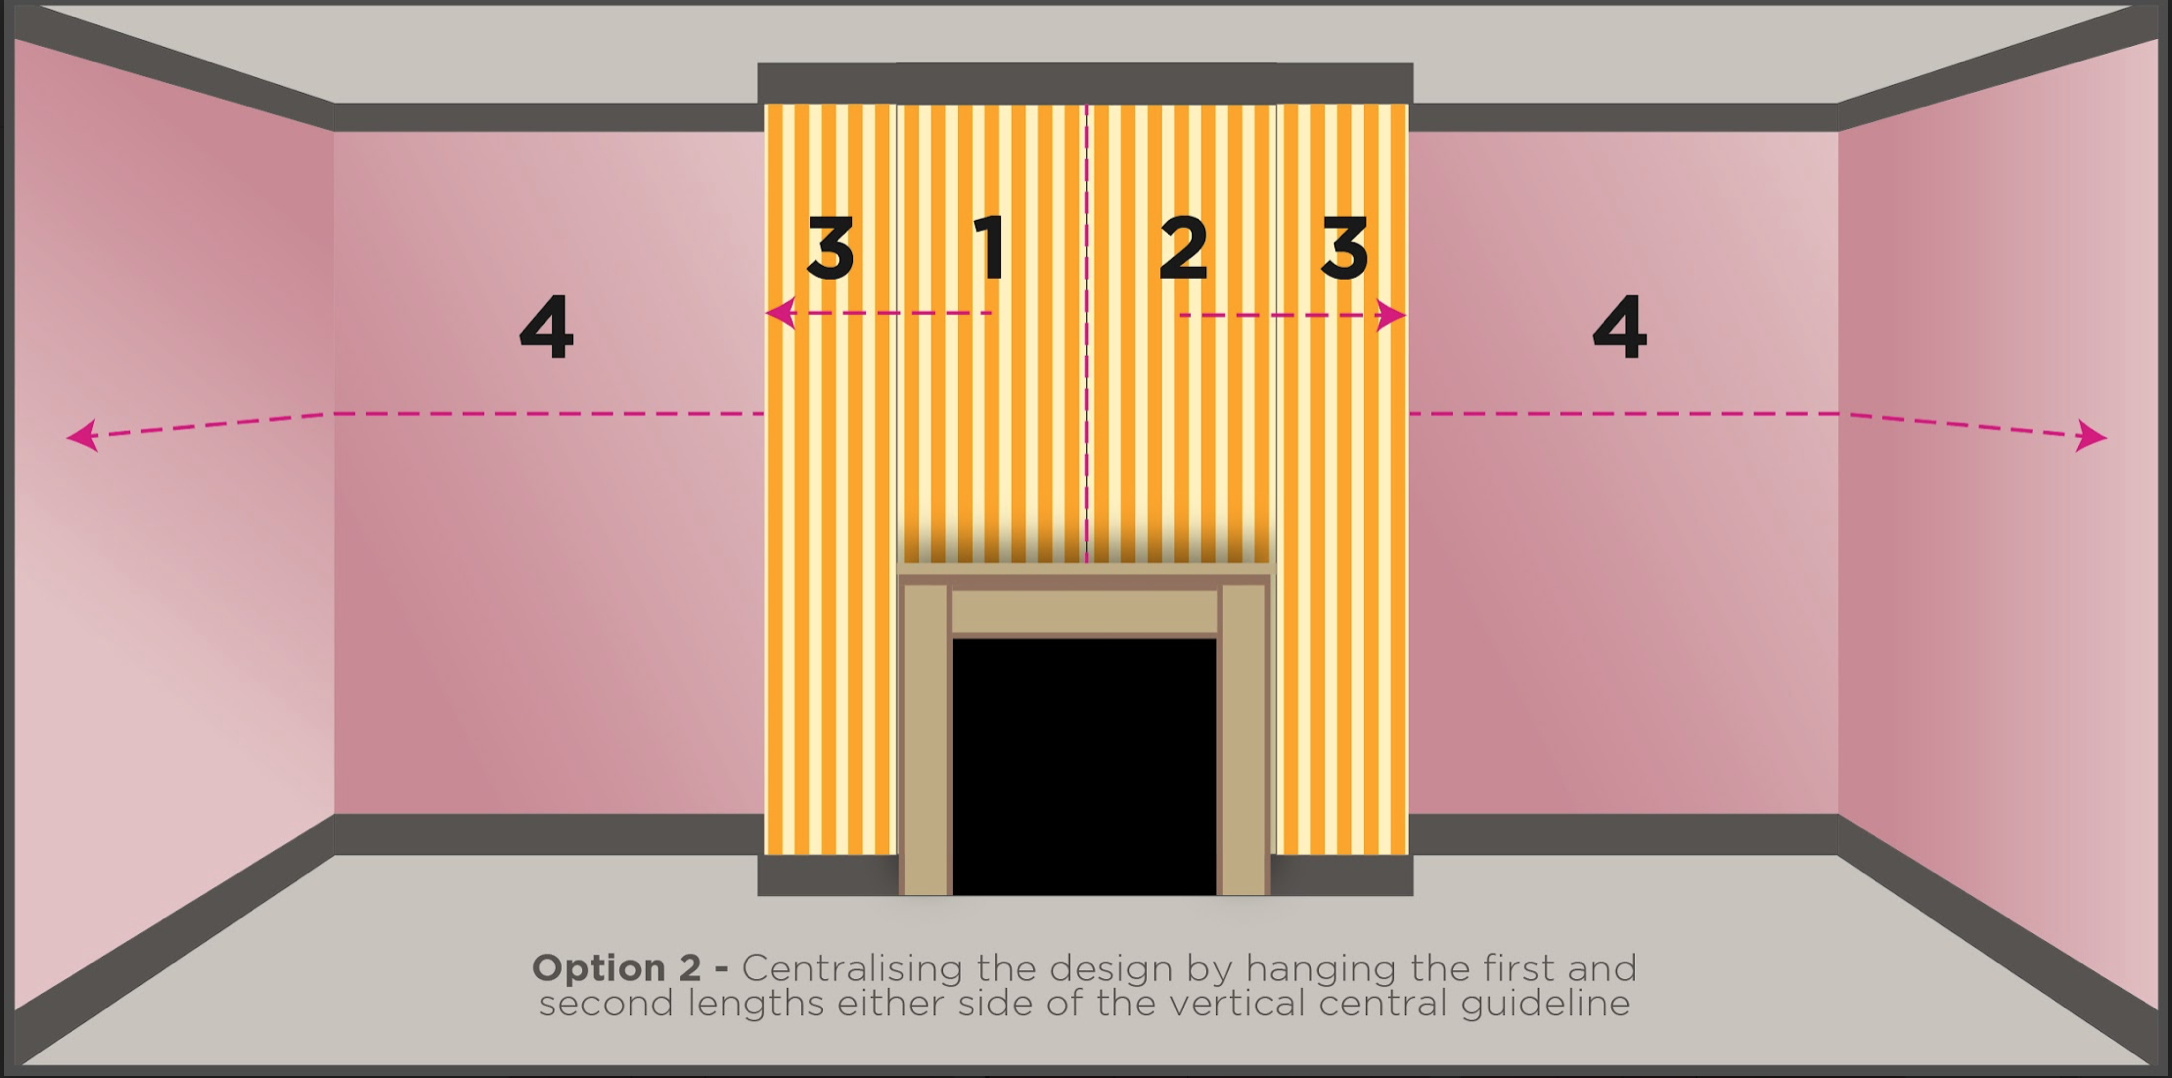
It can often make more sense to hang your first two lengths either side of the vertical guideline.
1. Measure the chimney breast and draw a line on the wall to mark where the centre is.
2. Hang the first length to the left of the plumbline.
3. Hang the second length to the right of the plumbline.
4. Continue hanging the next strips around the external corners onto the adjacent wall.
5. Continue wallpapering the more strips as you progress around the room.
If you liked this article, share it on Facebook or Twitter!
Want to learn more about how to make wallpapering easy?:
WallpaperBuddy™ Takes the Stress out of Wallpapering